
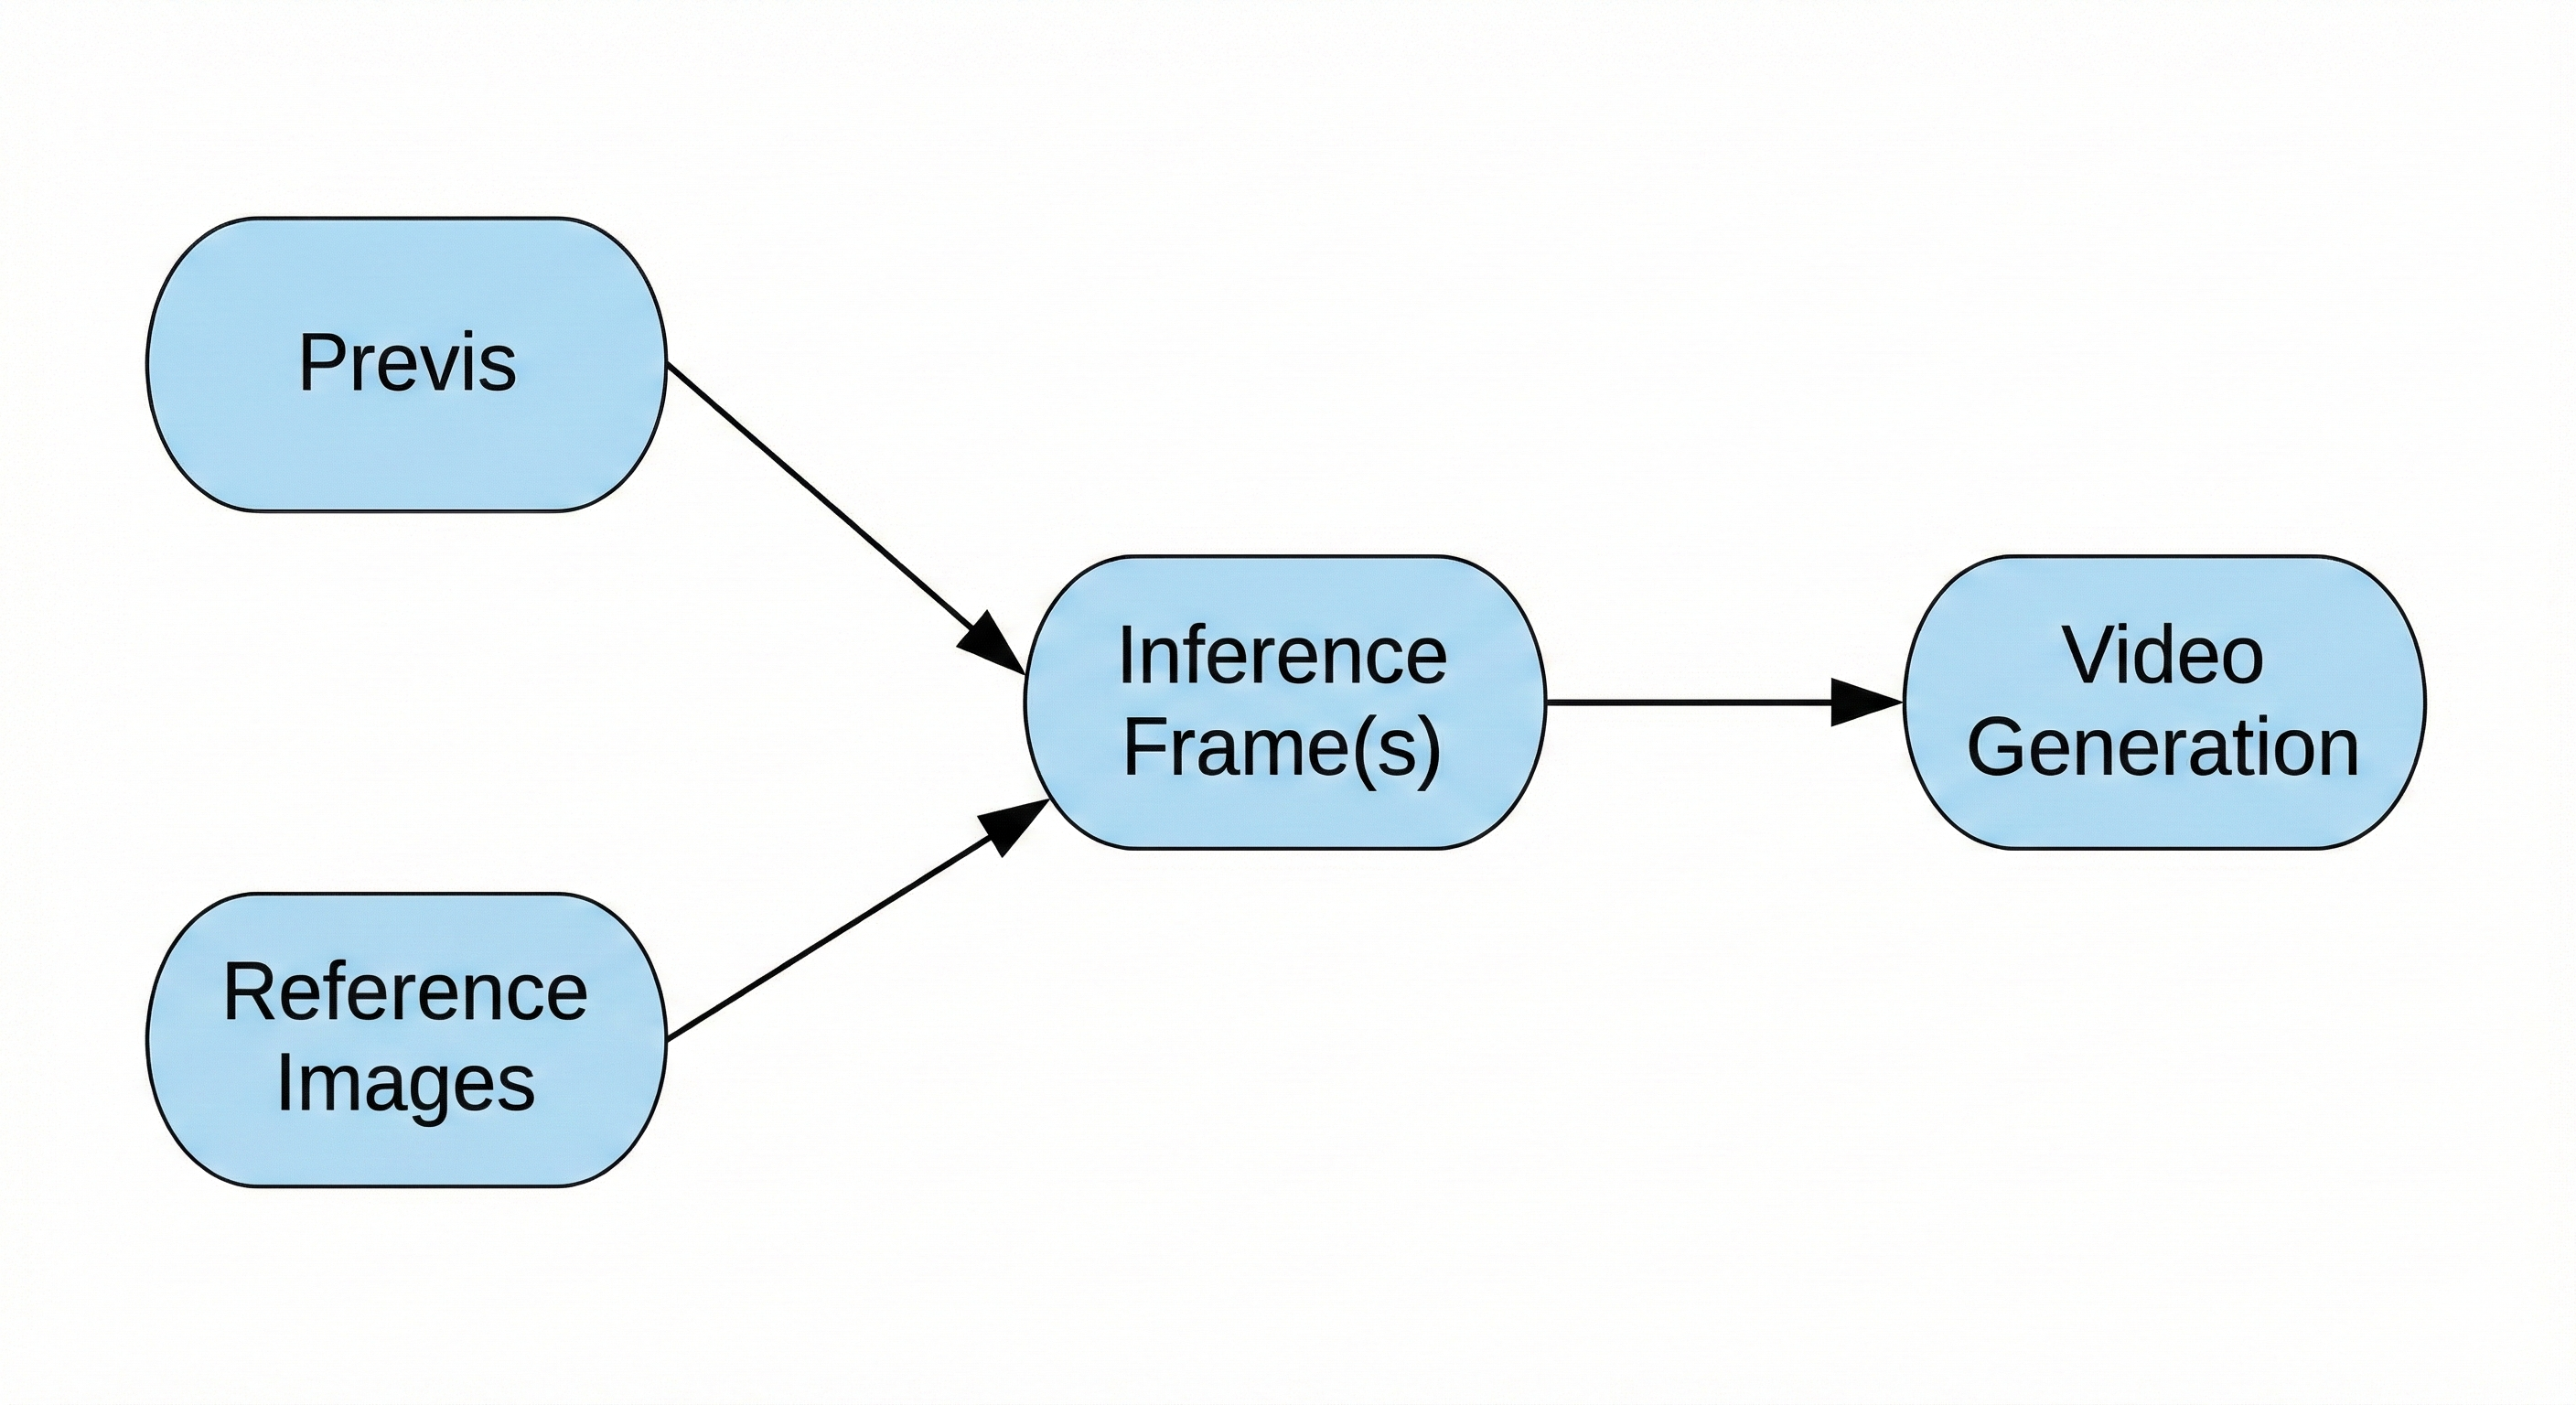
Inference frames are critical to AI video generation. They are embedded directly into the video and serve as the foundation from which the model infers motion, composition, and imagery over time. There are several types of inference frames: inference start frames, which define the first frame of the video; inference end frames, which define the final frame; and conditioning frames, which are injected mid-generation to better guide motion, visual continuity, and performance.
To create an initial inference frame, it is often helpful to start with an image from previs, a sketch, a frame from a plate, or another asset that can function as a layout image. It is also extremely helpful to provide reference material for the environment, as well as any characters, hero props, or key visual features that should be preserved in the shot.
While it is possible to generate inference frames entirely from a text prompt—in which case no reference images are required—providing reference images generally offers greater control over the final result.
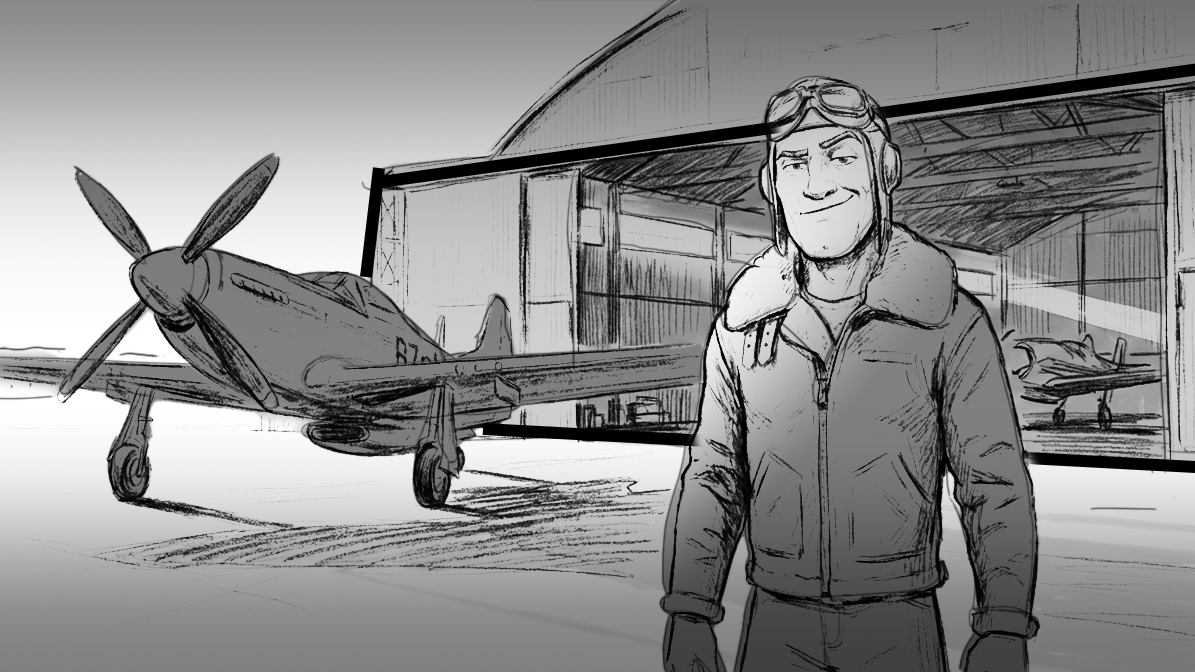
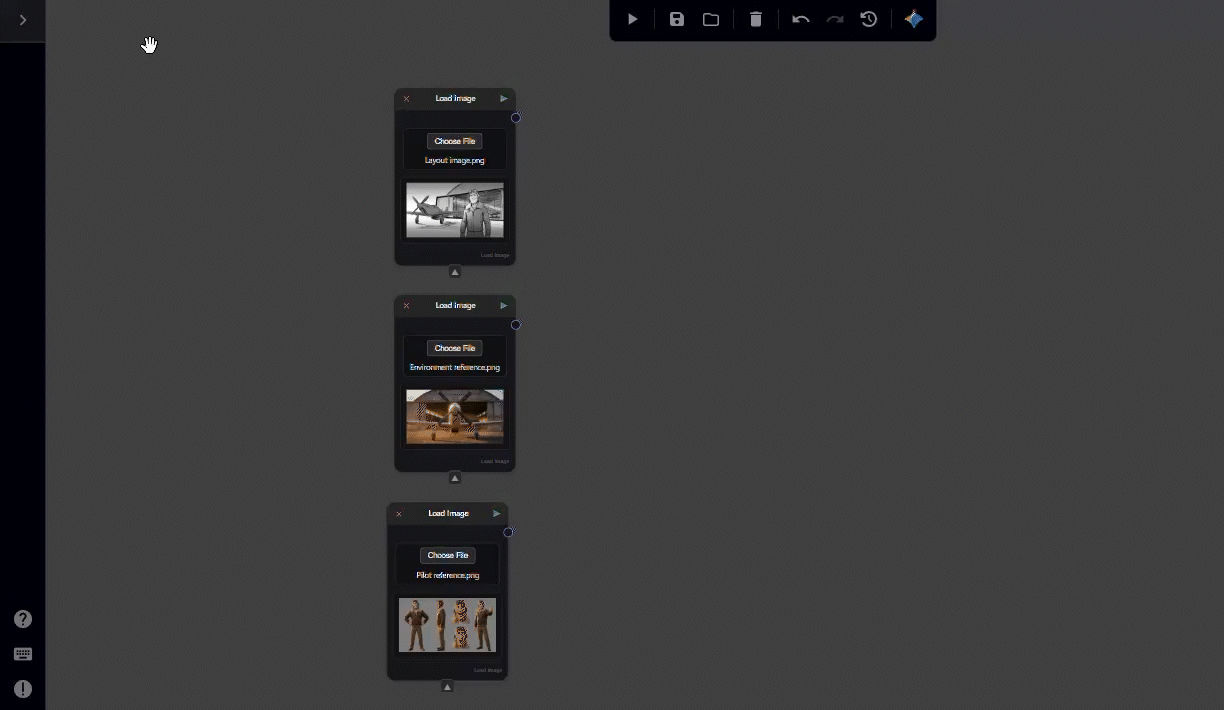
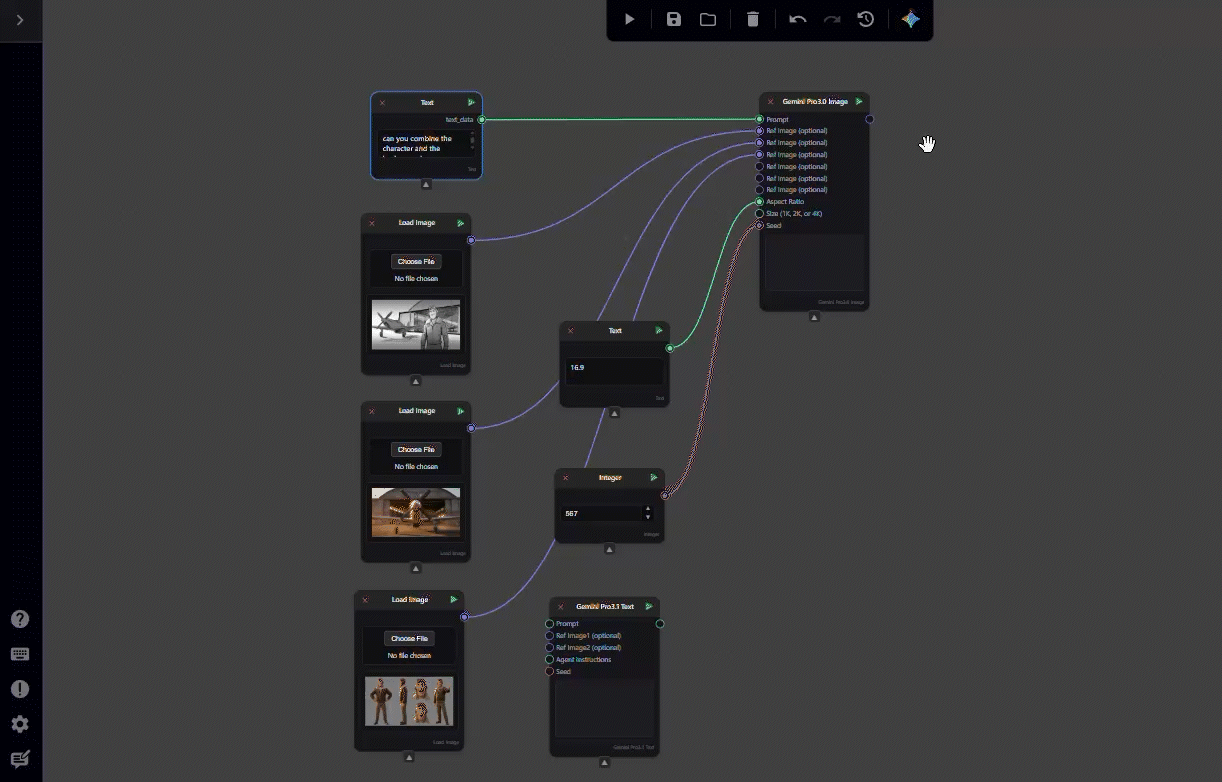
In this tutorial, we will use a sketch as our layout image, along with two reference images: one character sheet and one environment reference.
In this tutorial, you will create the inference frame shown below using a set of three images: a sketch to establish layout, a reference image for the environment, and a reference sheet for the pilot.

Let’s begin!
-
How to create and find a node in Nodey
To load images into Nodey’s interface, there are two available methods.
Right-click anywhere in the graph to open the node menu. A panel titled Search nodes will appear, displaying an alphabetical list of all available node types in Nodey. You can scroll through this list using either the scrollbar on the right side of the menu or your middle mouse wheel.
To add the correct node, click into the search bar at the top of the menu and type Load image. When the Load image node appears in the results, either click on it directly or ensure it is selected (highlighted in blue) and press Enter on your keyboard.
Alternatively, you can create nodes using the navigation bar at the top of the interface. Move your mouse to the upper-left corner of the screen and hover over the menu labeled Nodes. A drop-down menu will appear, listing different node categories (such as Audio, GenAI, and IO).
Hover over IO (Input/Output) to reveal a secondary menu. From there, hover over Load image and click to add the node to your graph.
-
Load your image(s)
Now that we have our node, we can load the images that will be used to construct the inference frame.
First, download the layout image, environment reference, and pilot reference images to your local machine.
To load the layout image, click the Choose File button on the Load image node and navigate to the location where you saved the layout sketch.
Alternatively, you can drag the image file directly into the Nodey interface. Nodey will automatically create a Load image node with the image already selected.
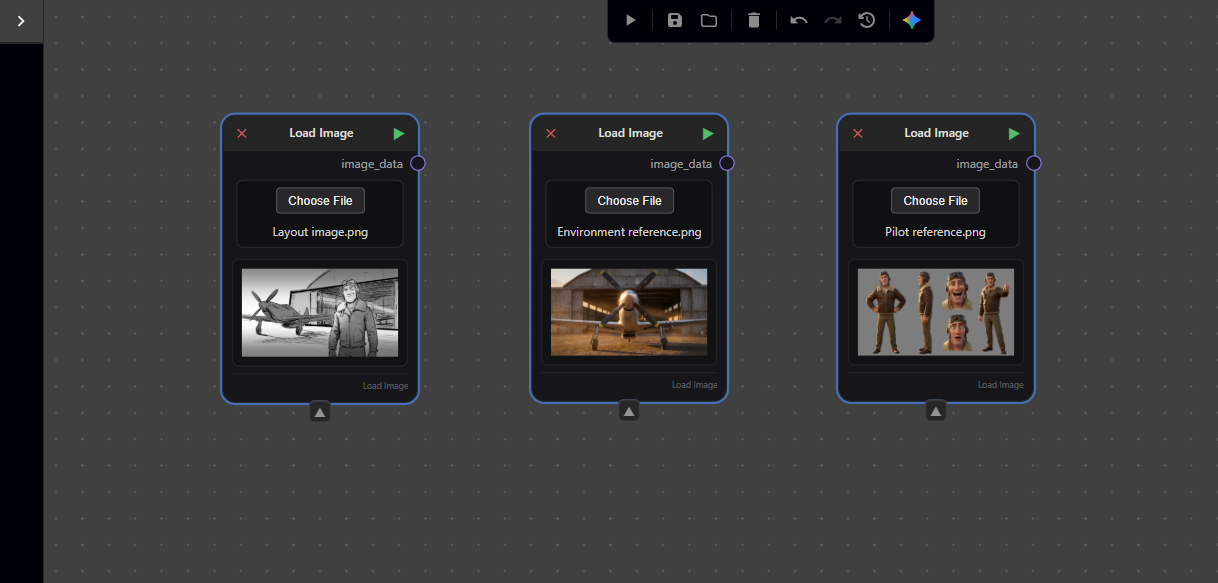
We still need two additional Load image nodes—one for the pilot reference and one for the environment reference. You can add these in any of the following ways:
-
Create new Load image nodes and manually load each image
-
Drag each image directly into the Nodey interface
-
Duplicate an existing Load image node by selecting it and pressing CTRL + C, then CTRL + V
If you duplicate an existing node, note that it will copy the currently loaded image—be sure to update the image so each node references the correct asset.
-
Create a node to call our generative model
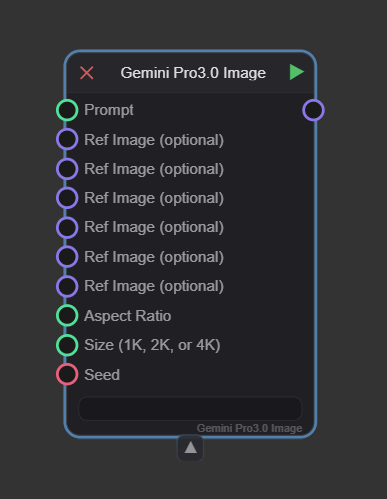
To effectively combine our images and generate the inference frame, we will use Gemini Pro 3.0 Image (or Nano Banana).
Right-click anywhere in the graph and search for the node, or navigate to Nodes → GenAI → Google and select Gemini Pro 3.0 Image.
You may notice that Gemini Pro 2.5 Image is also available. However, that model only supports two reference images as inputs. Because this tutorial requires three reference images (layout, environment, and pilot), we must use Gemini Pro 3.0 Image, which supports additional conditioning inputs.
.gif)
-
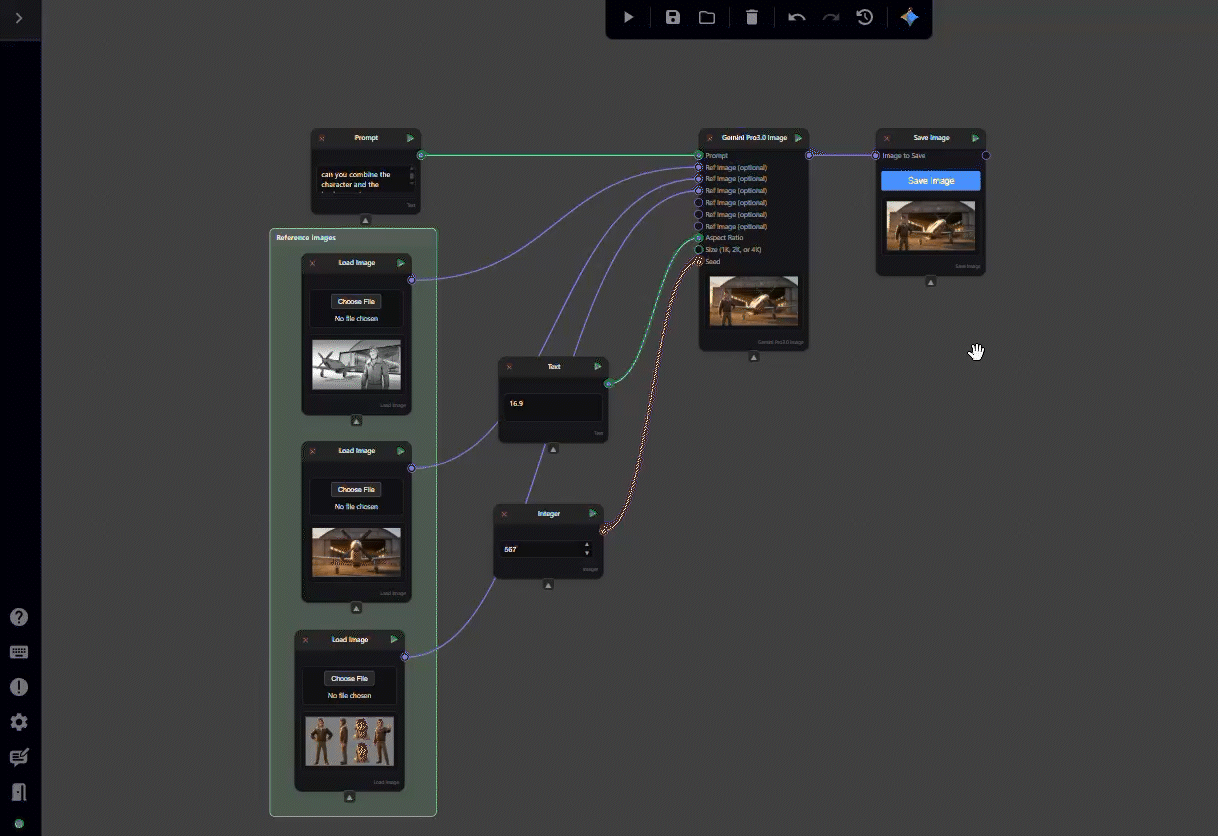
Understanding Gemini’s inputs
You’ll see a number of inputs that feed into the Gemini models. The only input that is actually required is the prompt, which will describe to the model what we want it to do. If you are only inputting the prompt, that will provide the bulk of the information for image generation. If you are providing an image or images (as we are in this tutorial) in addition, the prompt serves to describe how exactly we want the model to use, understand, and apply the reference images to our generated output image.
We see that the “Prompt”, “Aspect Ratio”, and “Size” nodes all have green circles next to them, this indicates that they are expecting a text input. The “Ref Image” inputs are next to a purple circle, showing they expect an image input. “Seed” has a red circle, which tells us it needs an integer input. You might also see a blue circle in your Nodey explorations, which tells us that node is expecting a float (or floating point number) – essentially a number with a decimal point ex. 2.5. There are also yellow circles which indicate a boolean value (true or false) is required.
-
Prompting
Let’s create a Text node so we can input our prompt.
Right-click anywhere in the Nodey graph and search for Text, or navigate to the Nodes menu in the upper-left corner of the interface, scroll to the very bottom of the drop-down menu, and click Text.
The text box in this node is where you will write the prompt describing what you want Nano Banana to generate. You may notice that the text box within the node is fairly small and can be difficult to work in. If you double-click inside the text box, a full-screen text editor will open. This makes writing and revising your prompt much easier.
Because we are using three reference images, our prompt needs to clearly describe how each image should be used. A simple example of a successful prompt might be:
Can you combine the character, and background into an image using the black and white sketch for composition. Can you adjust the prompt to use the composition established in "Layout image"
Tip: Nano Banana is often able to infer which image is which through natural-language descriptions alone. However, if your request is very specific—or if you are not getting the expected result—it can be helpful to explicitly reference each image by name and describe it before writing the main instruction.
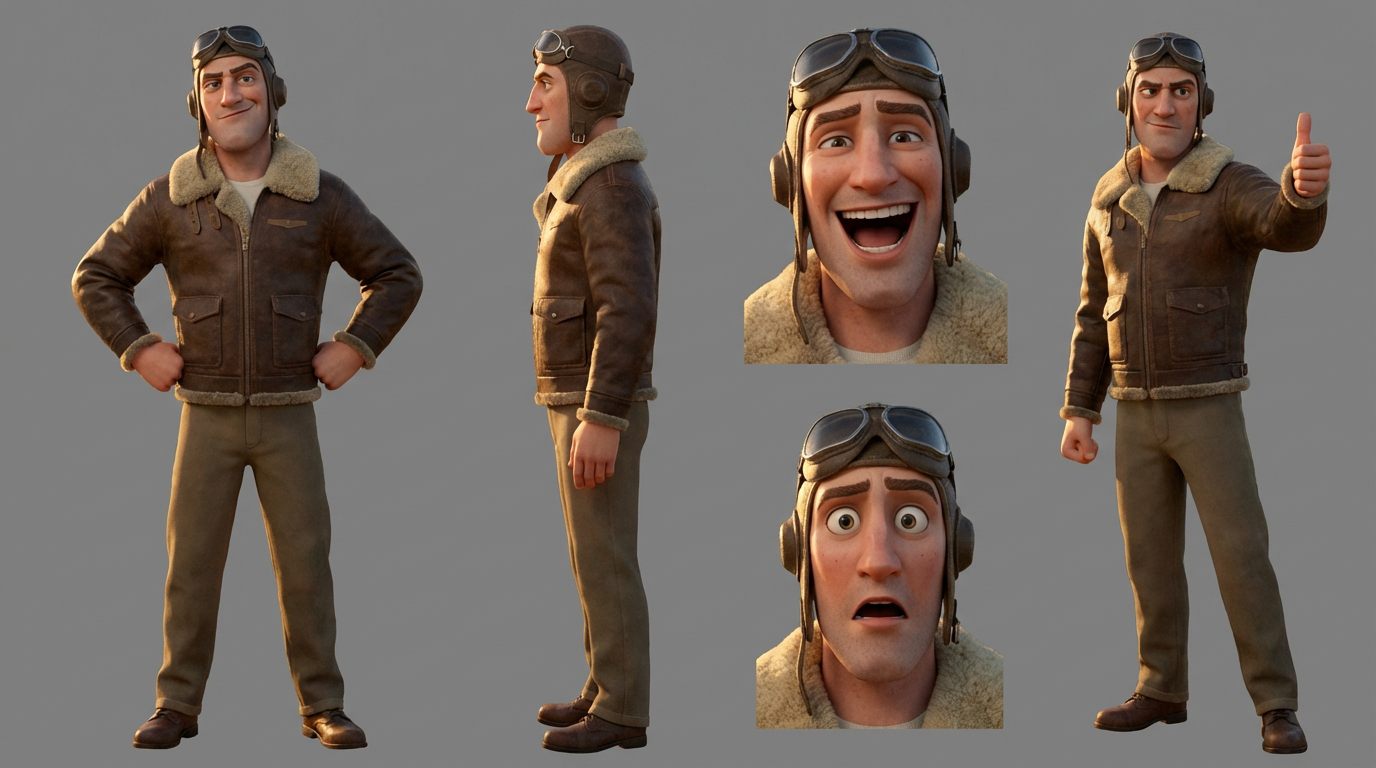
[“Pilot reference”] - A reference sheet of a stylized, 3D animated male pilot character with a rugged but friendly face. He wears a vintage leather flight jacket with a shearling collar, olive drab trousers, and a leather flight cap with goggles perched on top. The style is high-end cinematic animation with expressive features.
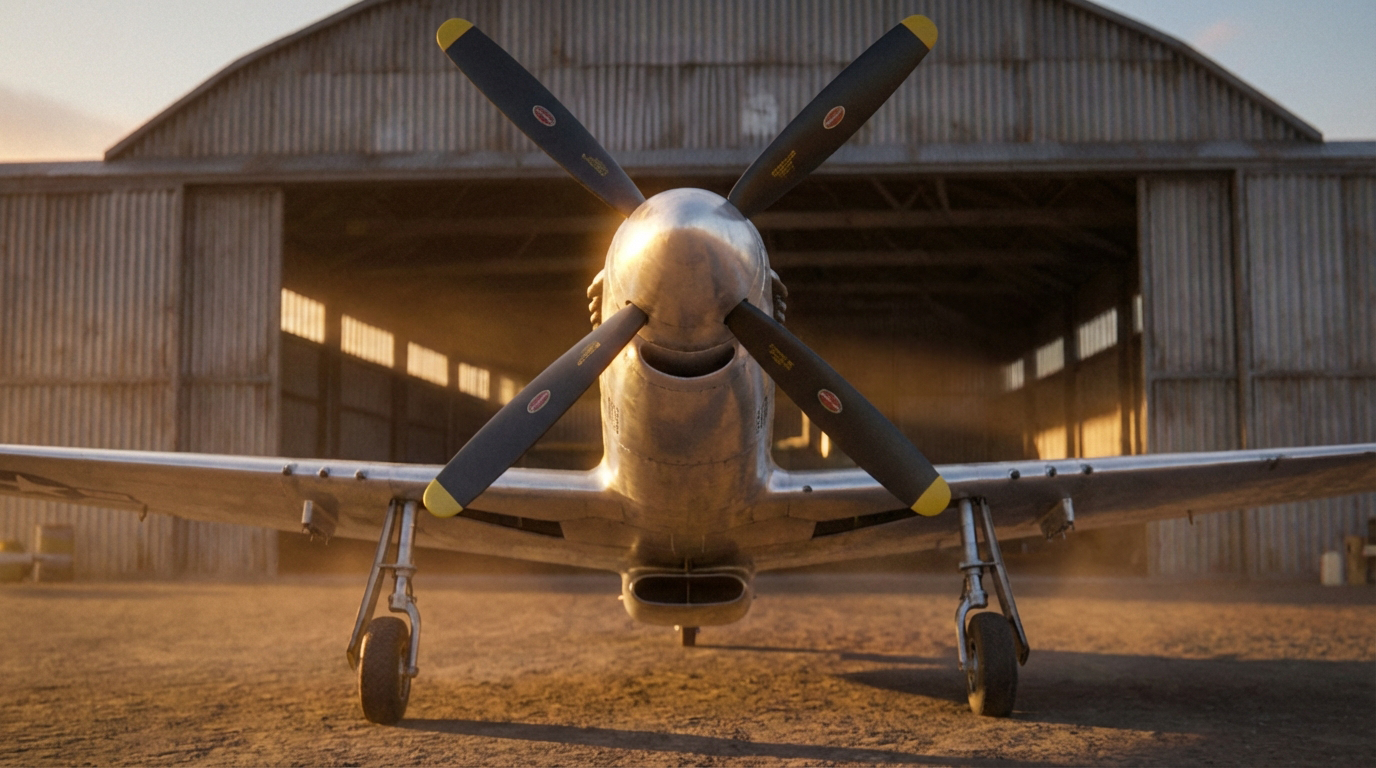
[“Environment reference”] - A wide-angle shot of a dusty airfield at golden hour. A massive, weathered corrugated metal airplane hangar sits in the background, with warm sunset light streaming through the gaps. The ground is a flat, sandy tarmac reflecting the orange and amber tones of the sky.
[“Layout image”] - A wide composition featuring a vintage P-51 Mustang fighter plane in the foreground on the left, angled toward the camera. On the right, a full-body character stands giving a thumbs-up. The hangar occupies the right background.
A cinematic 3D animation scene that uses [Layout Image] as the absolute structural template for composition and character posing. The pilot character in the layout must remain in his exact position and facial expression as seen in [Layout Image], but his physical appearance, facial features, and clothing textures must be mapped from [Pilot Reference]. Apply the warm, golden hour lighting, amber color grading, and environmental atmosphere from [Environment Reference] to the entire scene. Ensure the P-51 Mustang retains its position from the layout but with high-fidelity metallic textures. Do not adopt the standing pose from the pilot reference sheet; maintain the layout's specific character framing.
This example is intentionally detailed. In practice, it’s best to start with a succinct prompt and add specificity over multiple iterations to guide the model toward your desired result. For example, if early outputs show the pilot frowning but you want a friendly expression, you can explicitly specify that the character should be smiling in a follow-up iteration.
For this tutorial, the simplified natural-language prompt works well. However, if you repeatedly see the pilot adopting a pose from the character reference sheet, a more detailed prompt—or the Gemini Text node (see section below)—can help correct this behavior.
Once you are satisfied with your prompt, click Close and Save in the upper-right corner of the text editor. You should now see your Nodey graph again, along with your updated Text node. You can scroll within the node’s text box using the up and down arrows to confirm that the full prompt is present.
-
(Optional) Create a node to help translate your prompt for Gemini
If you find yourself struggling to get Nano Banana to understand what you are asking for, it can be helpful to use Gemini (Google’s text-generation model) to assist with wording and translate your intent.
Right-click anywhere in your Nodey graph and search for Gemini Pro 3.0 Text (you may also see Gemini Flash 2.5 Text as an available option). You can also access this node by navigating to the Nodes menu, hovering over GenAI → Google, and selecting the desired node.
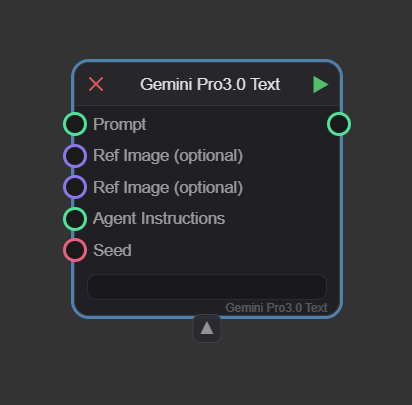
This node accepts several inputs: a Prompt (the only required input), up to two reference images, agent instructions, and a seed. The Prompt input should be connected to your existing Text node.
Agent instructions (also referred to as system instructions) define the foundational rules the model should follow, while the Prompt functions more like a creative brief for the current task.
If you find yourself repeatedly correcting the model on aspects such as image composition or artistic style, those corrections are strong candidates for agent instructions. For example:
Always prioritize the composition of the 'Layout Image' over any character poses seen in other references.
Always use a cinematic, 3D animated aesthetic similar to high-end studio films (e.g., Pixar or Dreamworks).
When a pilot reference is provided, always include a shearling collar and leather cap unless told otherwise.
-
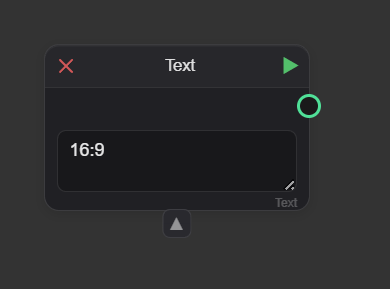
(Optional) Aspect ratio
Nano Banana allows you to explicitly define the aspect ratio of the generated output image. If no aspect ratio is specified, the model will generate the image using the aspect ratio of one of your reference images, chosen at random.
Nano Banana accepts the following aspect ratios as valid inputs:
1:1, 3:2, 2:3, 3:4, 4:3, 4:5, 5:4, 9:16, 16:9, 21:9
To specify an aspect ratio, create a Text node and enter the desired aspect ratio exactly as shown above (for example, 16:9). This text node can then be connected to the aspect ratio input on the Nano Banana node, as shown below.
-
(Optional) Seed
In generative AI, the process starts with a field of random static (noise). The AI "carves" your image out of that noise. The seed is the specific pattern that random noise takes.
Without a seed, AI is like a goldfish—it has no memory. If you ask it to draw a "Pilot by a plane" twice, it will give you two different pilots.
By using a Seed Value, you are telling the AI:
-
"Start with this exact static."
-
"Use the same 'random' choices you made last time."
This is the only way to achieve consistency. If you love a specific image but want to change the pilot's hat from brown to blue, you keep the Seed the same and only change the word "brown" to "blue" in your prompt. Without the same seed, the AI would generate a completely different person, plane, and background.
In a tool like Nano Banana, the seed is the "DNA" of the image.
-
Different Prompt + Same Seed = The same "vibe" or layout, but with new details.
-
Same Prompt + Different Seed = The same "subject," but a totally different look and composition.
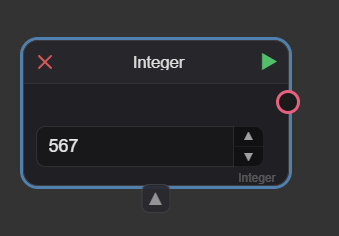
If you do not specify a seed value, the model will select one at random. To ensure consistent results across runs, you can explicitly define a seed by creating an Integer node.
To add an Integer node, either right-click anywhere in the graph and search for Integer, or navigate to the Nodes menu and scroll to the second-to-last entry. Once the node is created, enter any whole number into the node’s value field. This number will be used as the seed.
Using a fixed seed allows you to reproduce results more reliably when adjusting prompts, references, or other parameters.
-
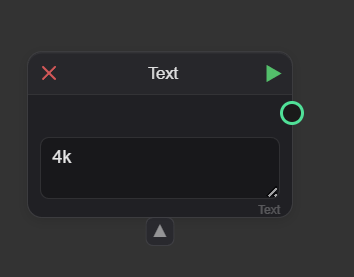
Size
We can also use a Text node to specify the desired output resolution of the generated image. As noted in the Gemini Image node, Nano Banana supports output resolutions of 1K, 2K, and 4K. If left unspecified, the default is 1K.
To set the resolution, create a Text node and enter one of the supported values exactly as listed above (for example, 4K). This text node can then be connected to the resolution input on the Nano Banana node.
-
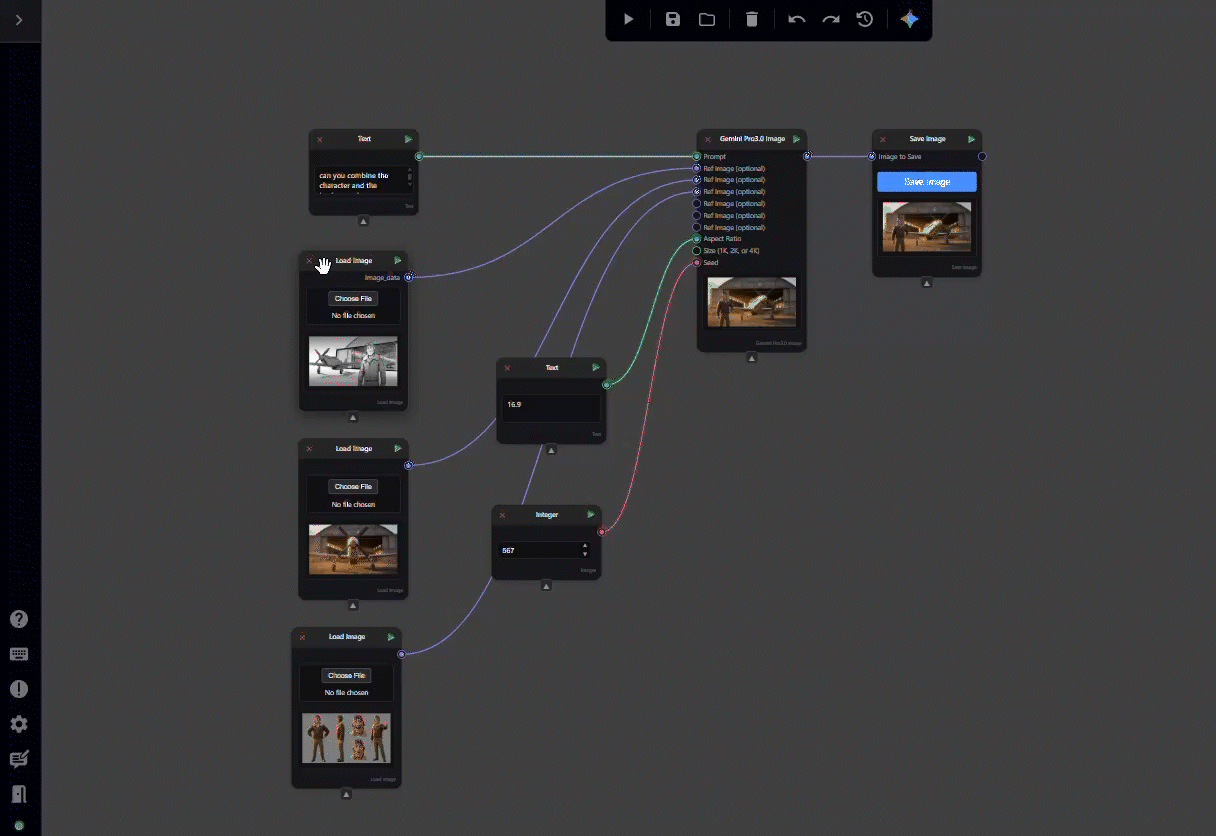
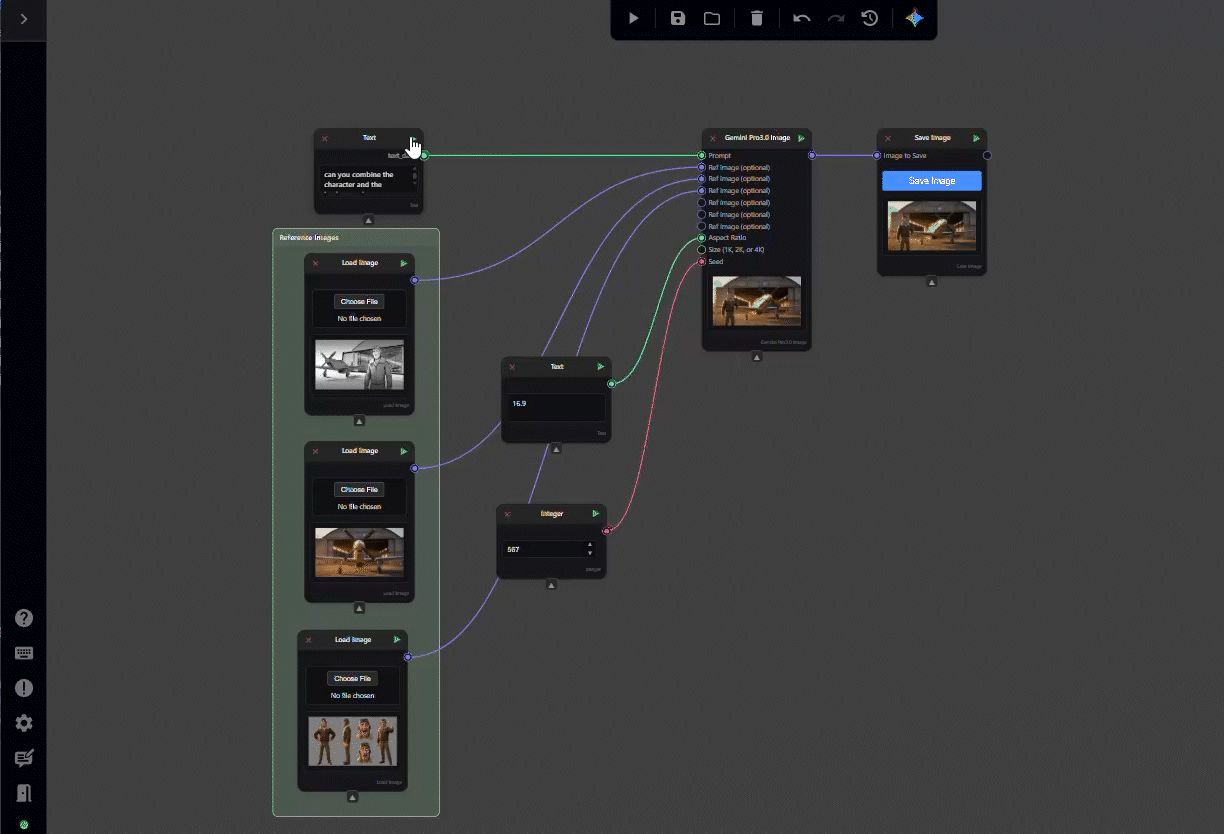
Connect the nodes
At this point, all of our nodes exist independently and are not yet communicating with one another. To define the flow of information and ensure the model understands which inputs to use—and in what order—we need to connect the nodes.
To create a connection, click the output circle on the right side of a node (for example, the green circle on the right of the Text node). While holding the mouse button down, drag outward toward the corresponding input circle on the next node in the chain (in this case, the Prompt input on the Gemini Pro 3.0 Image node). A line matching the color of the selected output will appear and extend with your cursor.
Continue dragging until the line connects with the input circle of the target node, then release the mouse button to complete the connection. Be sure to keep the mouse button held down until the connection is made—if you release too early, the line will disappear and the connection will not be created.
If you create the wrong connection, right click on the line and a dropdown menu should appear that allows you to disable (grays out the line) or delete the connection.

-
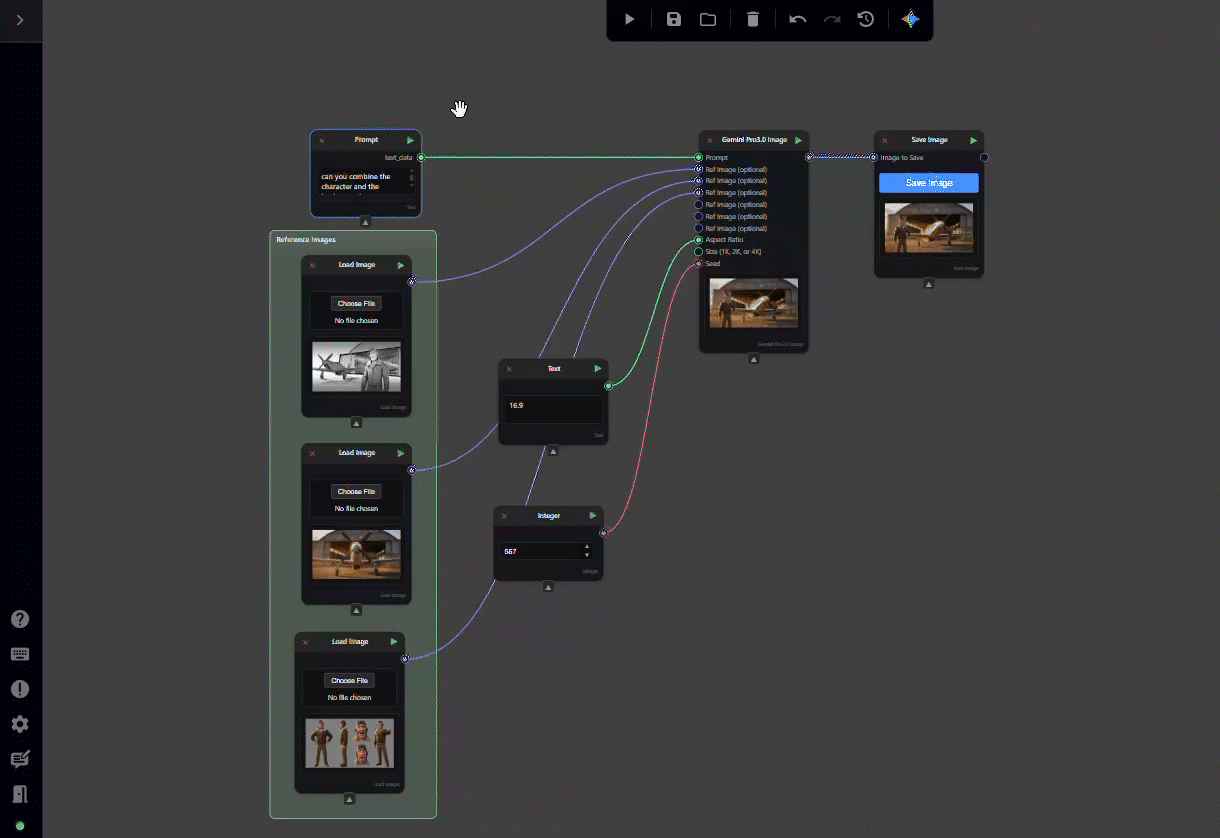
How to run the node
Nodes are run by clicking the green play triangle in the upper-right corner of each node. Nodes can be run individually or as part of a sequence, though most workflows require running several nodes together for anything to happen.
Node execution is additive. If you run the final node in a chain, all preceding connected nodes will automatically be processed. You do not need to run the entire graph every time, however. You can select a node in the middle of your graph and click its green play triangle; in this case, all nodes connected before that node will run, while any nodes after it will not.

You can now run your graph by clicking the green play triangle on the Gemini Pro 3.0 Text node—but here’s a hint: even if the generation is successful, you won’t be able to keep it just yet.
-
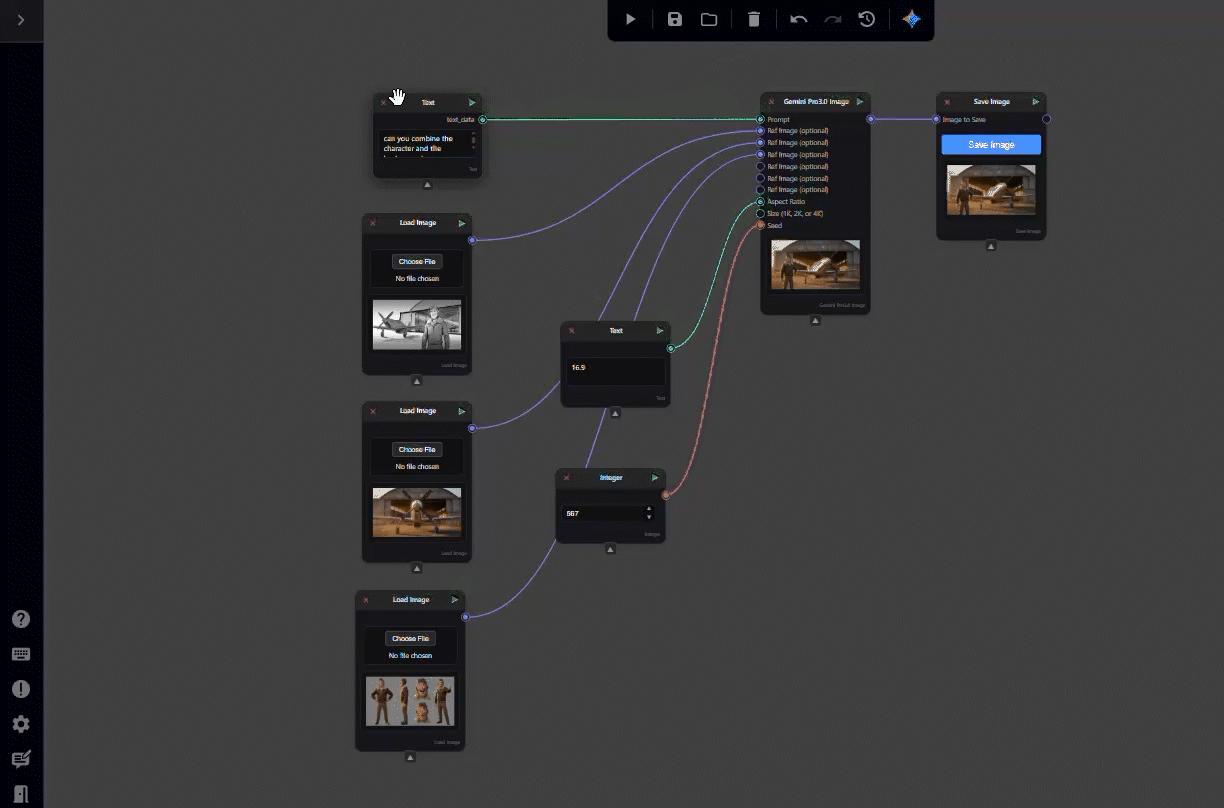
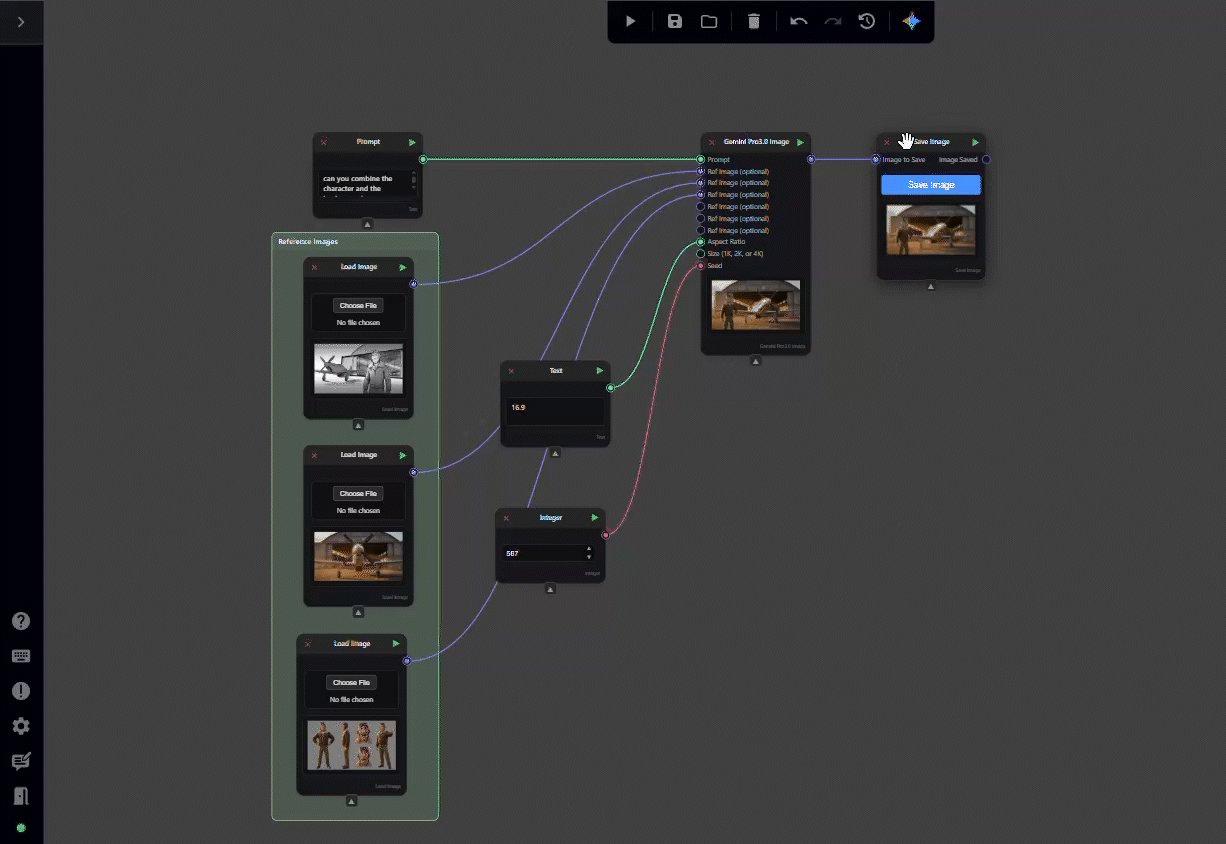
Create a save node
Right-click anywhere in the graph and type Save Image into the search bar, or navigate to the Nodes menu, hover over IO, and click Save Image.
To save an image, you must first run the node. Once the node has finished running, click the Save Image button and choose where you would like the image to be saved on your machine.

The Save Image node does not need to appear at the very end of the chain. You can place Save Image nodes at multiple points throughout your graph to export intermediate results and capture different stages of the process.
In this tutorial example, the various elements of our image integrated cleanly in a single pass. However, there are many cases where additional control can be gained by segmenting the image into layers or intermediate outputs—as we will explore in the next example.
-
Loading a graph into Nodey
You’ve successfully built your first Nodey graph! If you missed any steps—or if you’d like to see all of the nodes laid out together—you can download a JSON file of the completed graph here.
After downloading the file to your machine, open a blank Nodey interface and either drag the JSON file directly into the graph, or use the navigation bar at the top of the interface: click Load Graph (located between Run Graph and Save Graph) and select the downloaded file.
If you load the JSON into an existing Nodey graph, the contents of the file will be added to your current graph rather than replacing it.
-
Nodey formatting and options
You can select multiple nodes in Nodey in a few different ways. To select a group of nodes, hold Shift, then left-click and drag to draw a blue selection box around the nodes you want to include. Any nodes inside the box will be selected.
Alternatively, you can select individual nodes by holding Shift and clicking on each node you want to add to the selection.
Once you have nodes selected, you can group and label them by pressing G on your keyboard. Grouping nodes helps keep your workflow organized, especially when working with multiple node chains within a single graph.
You can also rename nodes by double-clicking the node’s name. The name will become an editable text field, allowing you to delete the default name and replace it with something more specific to your workflow.
If you’re ever unsure what a node does, hover your mouse over it to display a tooltip describing the node’s purpose and the inputs it accepts.
You can disable or enable nodes by right-clicking on a node. A menu will appear that allows you to select Disable (or Enable if the node is already disabled). This is useful if you want to preserve your workflow while testing how it behaves without a specific node—for example, temporarily disabling the Gemini Pro 3.0 Text node.
You can similarly enable or disable individual connections by right-clicking on the connection line between nodes.
There is a fourth way to load an image into your graph, but it is only available once you have a Save Image node. If you click and drag the generated image from the Save Image node into an empty area of your Nodey graph, a Load Image node will automatically be created at the drop location, with the generated image already preloaded.
Inference Frame Creation Part 2
Now that you have a better understanding of how to use Nodey to create an inference frame, try building one on your own. Below is the reference image you should aim to recreate:
.png?cb=1273b92cc960eeb98d81b6c2c72d50ed)
.png?cb=a3fdc4ca6e1c0ce95eb30ad107606ee7)
.png)
Download the previs, environment reference, and character reference images, and practice recreating the image above using the methods discussed in this tutorial.