
We recommend reviewing the preceding tutorial prior to beginning.
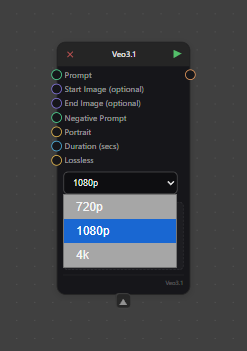
Veo3.1 is a robust tool for rapidly generating high-quality AI videos. It produces content at 1080p resolution in either 16:9 or 9:16 aspect ratios, complete with realistic, synchronized audio and sound effects. While videos can be generated using only a text prompt, including a reference image (inference frame) typically yields more precise results. For maximum control, Veo3.1 supports both 'Start' and 'End' inference frames. Users can select video durations of 4, 6, or 8 seconds; if no duration is specified, the system defaults to 8 seconds."
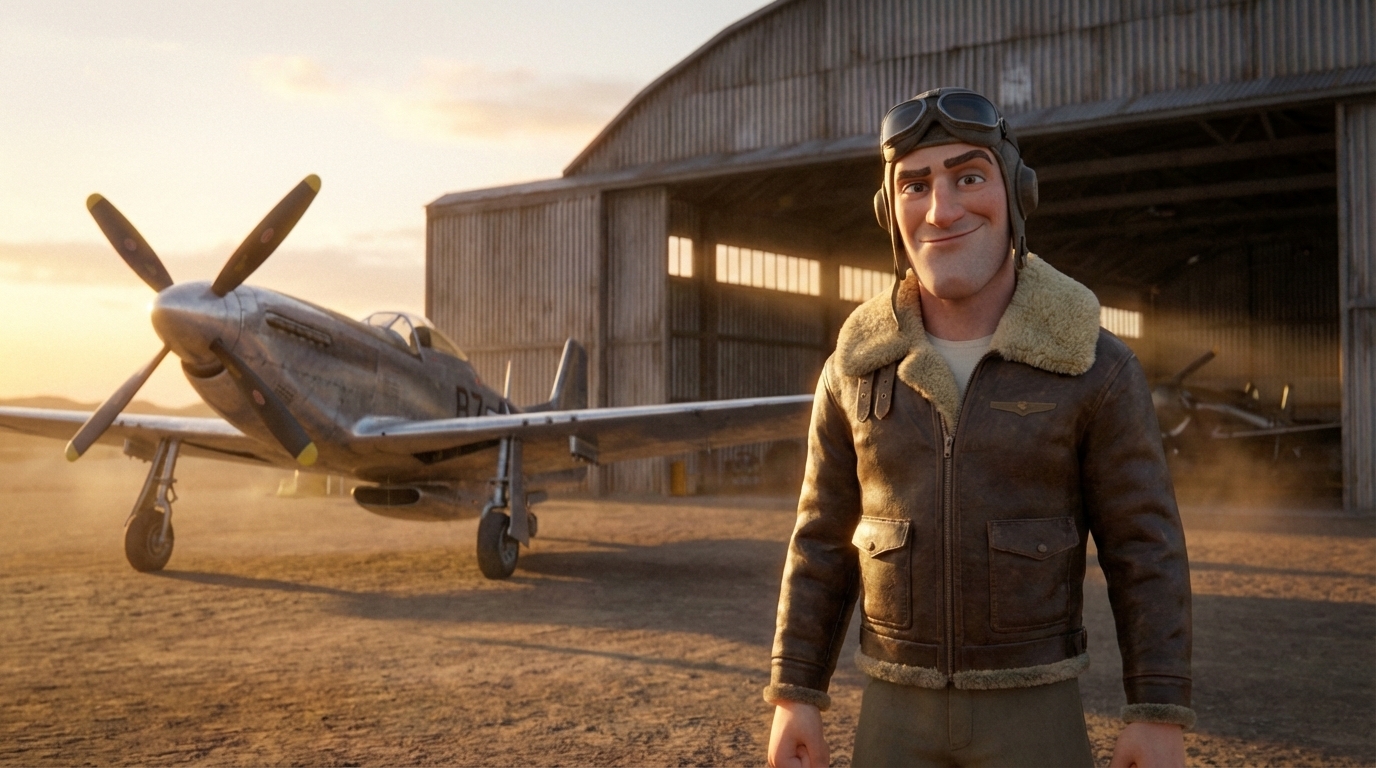
In this tutorial, we will create a video using a text prompt combined with a single reference image: the Inference Start Frame from our previous lesson.
Let’s begin!
How to Create and Find a Node (Note: If you are already familiar with adding nodes, you can skip to Step 2.)
-
Open Menu: Right-click anywhere in the graph to open the Search nodes panel. This displays an alphabetical list of all available tools.
-
Search: You can scroll through the list using your mouse wheel, but it is faster to click the search bar at the top and select "Load”.
-
Select: When the node appears in the results, click it directly or ensure it is highlighted and press Enter.
Create a node via right click
Method 2: Using the Menu Bar Alternatively, you can add nodes via the main navigation bar:
-
Open Menu: Click in the menu bar in the upper-left corner of the interface.
-
Navigate: A panel will appear showing all the categories like Audio, GenAI, and IO.
-
Select: Hover over the “Search nodes box” and click to reveal a drop down list, click on “load” to reveal the sub menu and then find and click Load Image to add it to your graph.
Load image via navigation menu
-
Load your image
Now we will load the reference image for the video generation.
-
Download: Save the Inference Start Frame image to your computer.
-
Upload: Click the Choose File button on the Load Image node and select the file you just saved.
TIP: Alternatively, you can drag the image file directly into the Nodey interface. This will automatically create a Load image node with the image already selected.
-
Add the Veo3.1 Node
To combine our image and prompt, we will use the Veo3.1 node. You can find this by right-clicking anywhere in the graph to search, or by navigating to Nodes → GenAI → Google → Veo3.1.
Note: You will see other Veo3.1 options in this menu. Here is what they do:
-
Veo3: Google’s first diffusion‑family video generator.
-
Veo3.1 Ref Images: Allows users to upload up to three reference images to guide the composition, character, and style.
-
Veo3.1 Video Extension: Extends an existing 8-second clip by adding a new 7-second segment.
For this tutorial, select the standard Veo3.1 node.
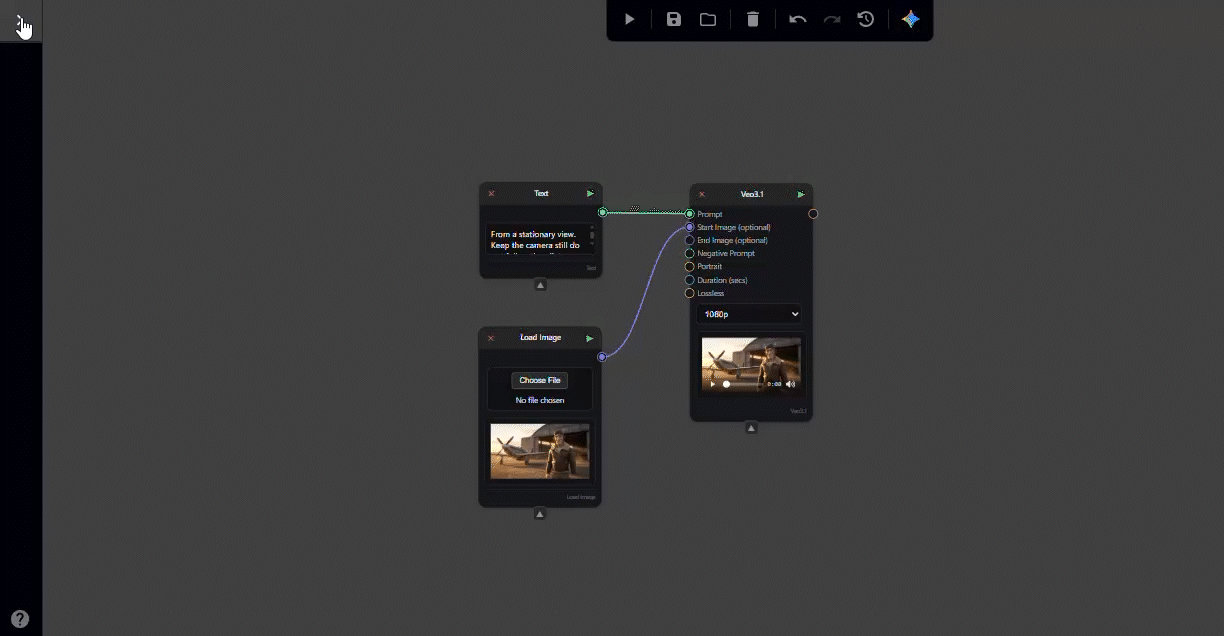
Understanding Veo3.1’s inputs
While the Veo3.1 node offers several input options, we will focus on just two for this tutorial:
-
Prompt: This is where you describe the scene to the model, including character details, specific actions, and camera motion.
-
Start Image: This is where we connect the Inference Start Frame from the previous tutorial, providing a strong visual reference to guide the generation.
Other Available Inputs:
End Image (Purple Circle): Requires an image input.
Negative Prompt (Green Circle): Requires a text input.
Portrait (Yellow Circle): Requires a Boolean (True/False) value.
True: Sets the aspect ratio to 16:9.
False: Sets the aspect ratio to 9:16.
Duration (Blue Circle): Requires an integer input of 4, 6, or 8 to determine the video length in seconds. If left empty, the generation defaults to 8 seconds.
Lossless (Yellow circle): Requires a Boolean ( True/False) value to turn on.
Dropdown Menu: Select a resolution or either 720p, 1080p or 4K
-
Creating the Prompt
First, we need a place to write our description.
-
Add a Text Node: Right-click anywhere in the graph and search for "Text," or navigate to the Nodes menu (top-left) and scroll to the bottom to select Text.
-
Enter Your Prompt: Use this node to describe exactly what you want Veo3.1 to generate.
Tip: The default text box is quite small. Double-click inside the box to open a full-screen editor, making it much easier to write and revise detailed prompts.
Crafting Your Prompt
This text node will drive the entire video generation process in Veo3.1. To get the best results, structure your ideas clearly. Break your description down into these key components:
-
Subject: Who or what is in the video?
-
Action: What is happening?
-
Scene/Context: Where is it taking place?
-
Camera: What is the angle and movement (e.g., zoom, pan)?
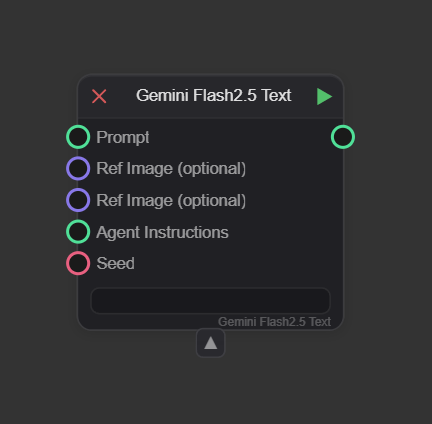
Tip: Enhance Your Prompt with Gemini As demonstrated in the AI inference tutorial, you can use the Gemini Flash 2.5 Text node to refine your writing. It often suggests vivid words or phrases you might not have considered.
-
Recap: This node accepts optional inputs like reference images and a seed, but only the Prompt is required.
-
Setup: Connect your existing Text node to the Prompt input.
-
Note: Remember that Agent Instructions define the foundational rules, while the Prompt acts as the creative brief for the specific task.
Gemini Flash 2.5Gemini Flash 2.5
Tips for Camera Control
While Veo3.1 recognizes camera commands in text prompts, it is not always fully controllable via keywords alone. For the most precise movement, I recommend combining your text prompt with Start and End inference frames.
Resource: For in-depth advice, refer to Google's official guide: The Ultimate Prompting Guide for Veo 3.1
Camera Movement Glossary
You can use these terms in your prompt to guide the visual style:
-
Static shot: The camera remains completely still.
-
Example: "Static shot of an airfield."
-
-
Pan (Left/Right): The camera rotates horizontally from a fixed position.
-
Example: "Slow pan left on the plane."
-
-
Tilt (Up/Down): The camera rotates vertically from a fixed position.
-
Example: "Tilt up from the pilot’s face to reveal the plane."
-
-
Dolly (In/Out): The camera physically moves closer or further away.
-
Example: "Dolly out from the pilot to emphasize his position."
-
-
Truck (Left/Right): The camera moves sideways, parallel to the subject.
-
Example: "Truck right, following the pilot as he walks."
-
-
Pedestal (Up/Down): The camera moves vertically while maintaining a level perspective.
-
Example: "Pedestal up to reveal the full height of the pilot."
-
-
Zoom (In/Out): The lens changes focal length to magnify the subject (the camera itself does not move).
-
Example: "Slow zoom in on the plane."
-
-
Crane / Aerial Shot: Sweeping movements from high angles or drones.
-
Example: "Sweeping aerial drone shot flying over an airfield."
-
-
Handheld: Unstable, jerky movements for realism.
-
Example: "Handheld camera shot during a chaotic takeoff."
-
-
Whip Pan: An extremely fast pan that blurs the image.
-
Example: "Whip pan from the pilot to his stationary plane."
-
-
Arc Shot: The camera moves in a circle around the subject.
-
Example: "Arc shot around the pilot."
-
Tip: Timestamp Prompting Veo3.1 allows you to time specific actions using timestamps.
-
Example: "The video follows a precise timeline: [00:00 - 00:03] The pilot salutes. [00:03 - 00:08] The camera pulls back while the pilot walks towards the plane."
-
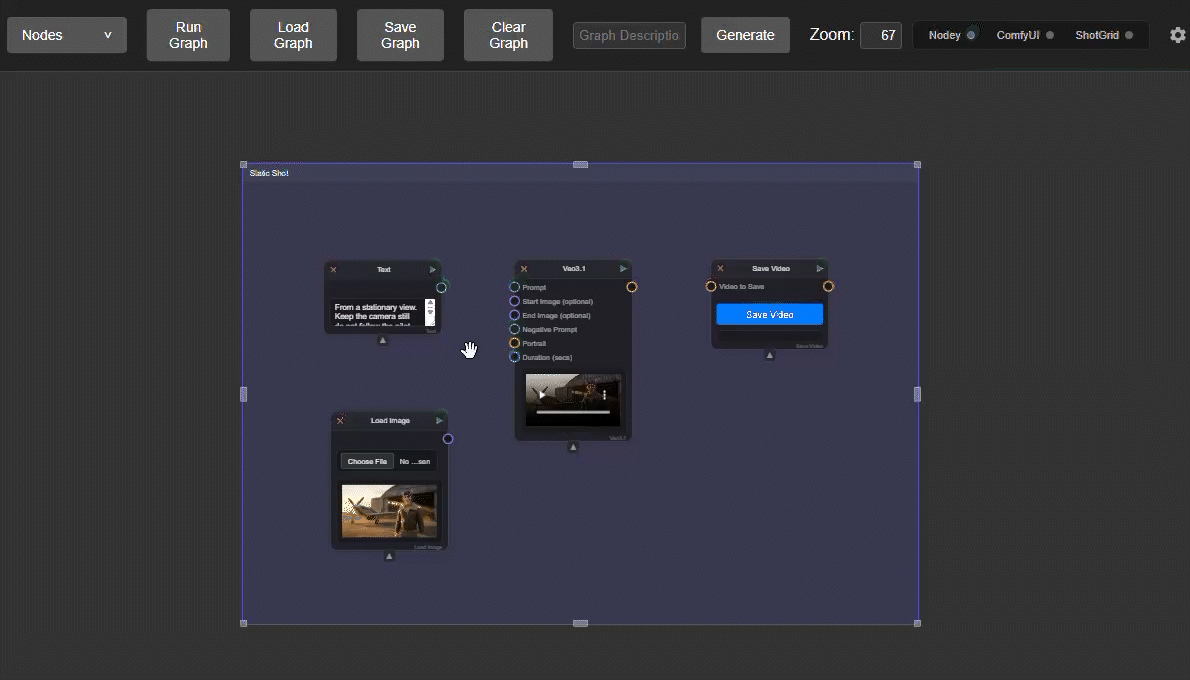
Create a Save Video node
Finally, add a node to save your output.
-
Add the Node
-
Right-click anywhere in the graph to open the node panel.
-
In the Search Nodes box at the top left, type "Save."
-
Select Save Video from the filtered results Nodes → IO → Save Video.
Save Your File
-
Note: You must run the graph before saving.
-
Controls & Options After executing the Save Video node, a menu is available within the window with the following options:
-
Fullscreen: Expands the video to fill the screen.
-
Download: Saves the video file to your device.
-
Mute: Silences the video audio.
-
Playback Speed: Adjusts the viewing speed (0.5x, 0.75x, 1.25x, or 1.5x).
-
Picture in Picture: Detaches the video into a small, floating window in the corner of your screen.
-
Grouping your nodes
Grouping is an excellent way to keep your workflow organized, especially when managing complex graphs with multiple chains.-
Create Group: Select the nodes you want to organize and press Ctrl + G.
-
Rename: Click the title bar of the new group to assign a custom name.
-
Color Code: Click anywhere inside the group box to open the color menu and change the background color for better visual separation.
-
-
Running the node
You execute nodes by clicking the Green Play Triangle in the upper-right corner of each node. While nodes can be run individually, most workflows rely on a chain of connections.
-
Automatic Chaining: Node execution is dependency-based. If you run the final node in a chain, the system will automatically process all preceding nodes connected to it.
-
Partial Execution: You don't need to run the entire graph every time. If you click the play button on a node in the middle of a chain, it will run that node and everything before it, stopping there without triggering any subsequent nodes.
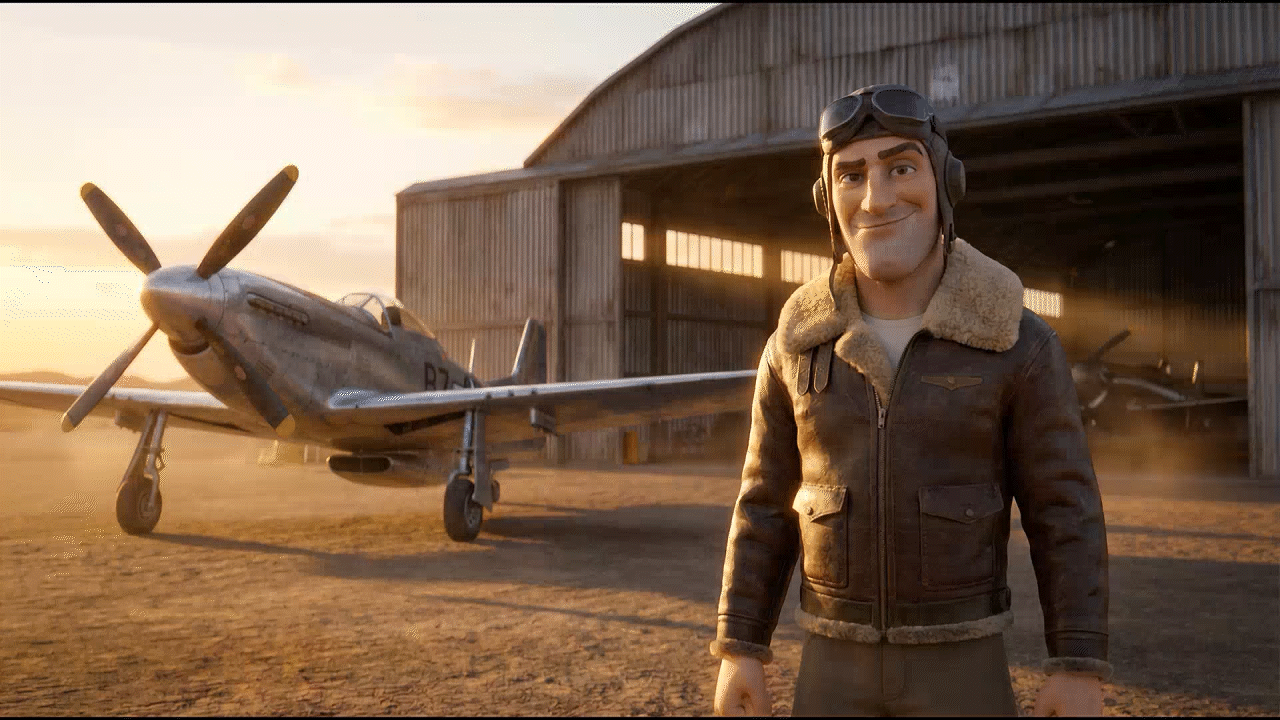
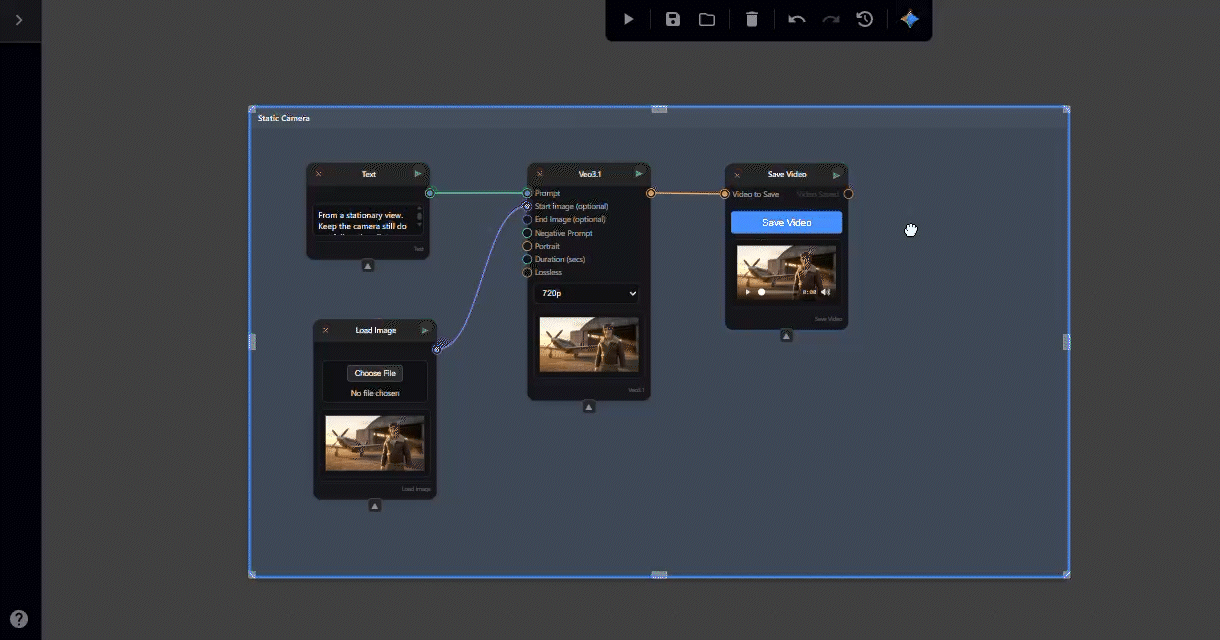
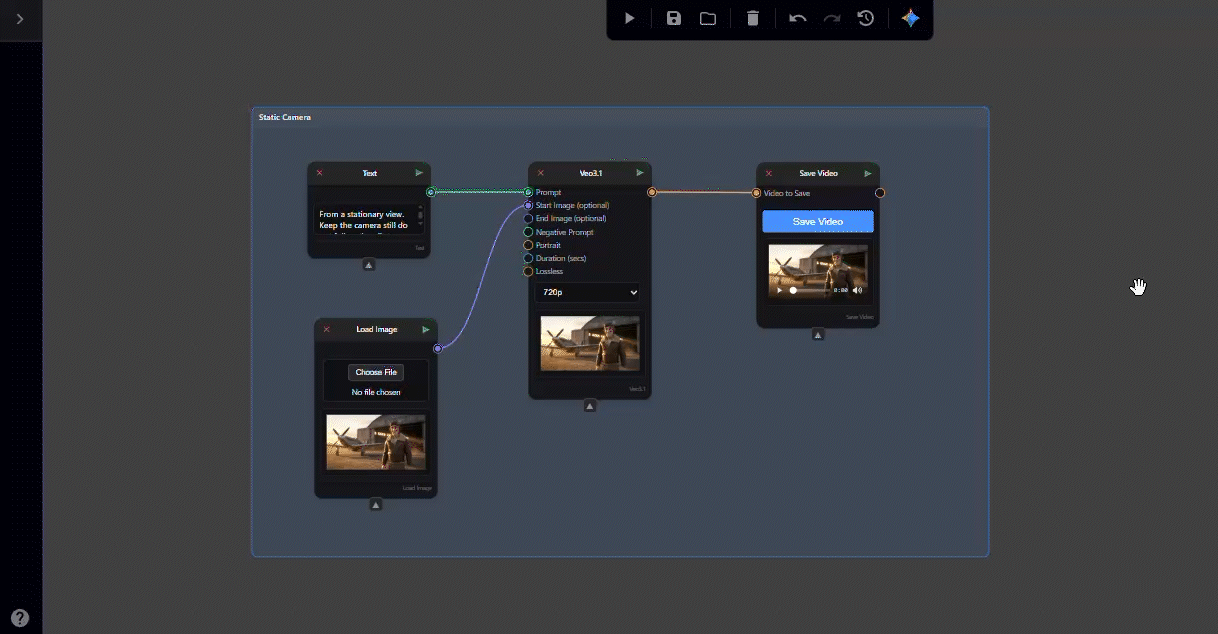
To generate this video, we used the following text prompt, which includes a static camera command along with the Inference Start Frame.
Prompt
”From a stationary view. Keep the camera still do not follow the pilot.
The pilot looks towards camera, looks serious for a moment with his mouth closed, salutes, and then smiles as he turns to walk back to towards his plane.
Dust blows lightly across the scene.
High resolution, 8k.”

Tip: Achieving a fully static camera in Veo3.1 can be difficult, as the model prioritizes tracking the character. As shown in the example above, prompts like "Tripod Locked," "Fixed Camera," or "Static Camera" may not always succeed.
Workaround: To force the camera to lock, try using your Start image “Start Inference frame” as the End image as well.
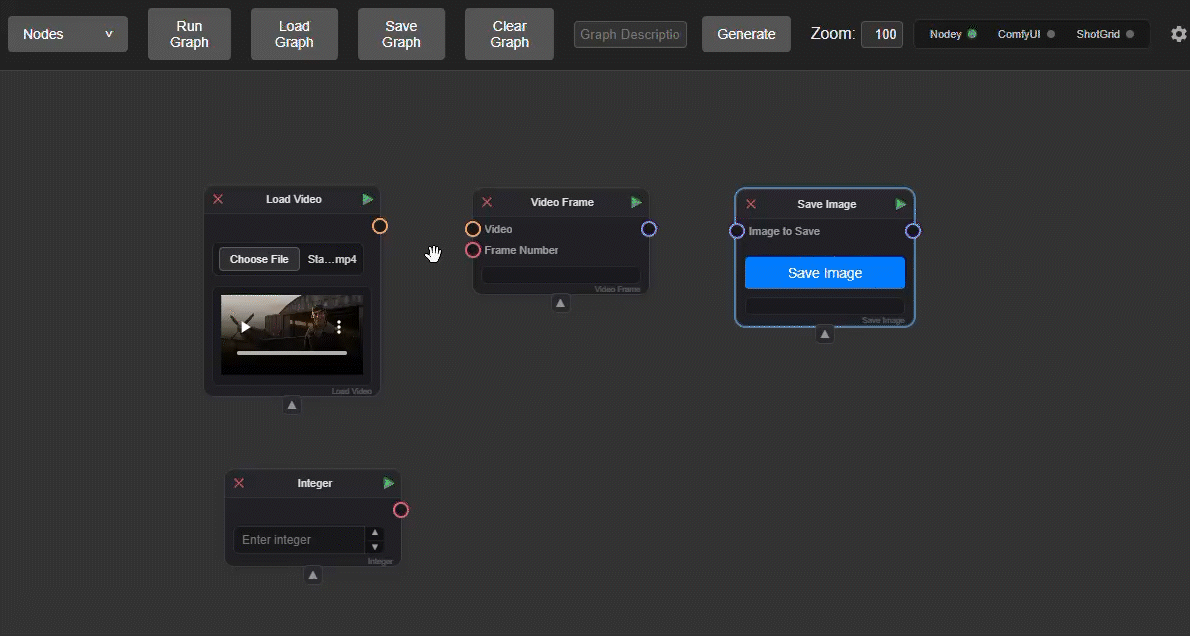
Workaround 2: Use Veo3.1 to Create a Custom End Frame Prompt Veo3.1 for your desired changes, then identify the perfect frame from the output. Use Nodes → Video → Video Frame to extract that specific image to serve as your new end frame.
Video Frame Inputs Video Frame has two inputs:
-
Video: Connect the Veo3.1 video generation output here.
-
Frame Number: Connect an Integer node to select the specific frame number you would like to use.
To generate this video, we combined the Inference Start Frame with a text prompt that includes specific "drone shot" and "timestamp" commands:
Prompt
Sweeping aerial drone shot flying over the airfield.
The video follows a precise timeline: [00:00 - 00:03] The pilot salutes. [00:03 - 00:08] The camera pulls back while the pilot is walking towards the plane.
resolution, 8k."

TIP: After your video is generated, you can detach the Save Video node. The video will remain cached inside that detached node, allowing you to run a new version on the main graph with a different seed or prompt without losing your first result.
-
Saving your Graph in Nodey
When you have finished setting up your workflow, click Save Graph in the top menu bar. A dialog window will appear, prompting you to name your graph and select a save location.
-
Loading your Graph in Nodey
To open a previously saved workflow, click Load Graph in the top menu bar. A file browser will appear, allowing you to navigate to and select your graph file.
-
Start creating in Nodey with Veo3.1
Now that you understand the framework for directing Veo3.1, the best way to master these techniques is to dive in and experiment. So lets get creative and start making some stuff!